If you've just launched a beautiful new site in Framer — congrats! You're off to a strong start. But here's the thing most creators miss:
Just publishing your site doesn't mean Google knows it exists.
To show up in search results, you need to tell Google your site is live — and you do that through Google Search Console (GSC).
In this tutorial, I’ll show you exactly how to connect your Framer site to GSC, verify it properly, and submit your sitemap so Google starts indexing your pages faster.
Whether you're a designer, freelancer, or building a personal brand — this is a must.
How Do You Access Google Search Console?
To start connecting your Framer site, you'll need access to Google Search Console — the tool that tells Google your website exists.
Click “Start now” and sign in with your Google account
You’ll see a screen like this:

In the top-left dropdown, click “Add property”
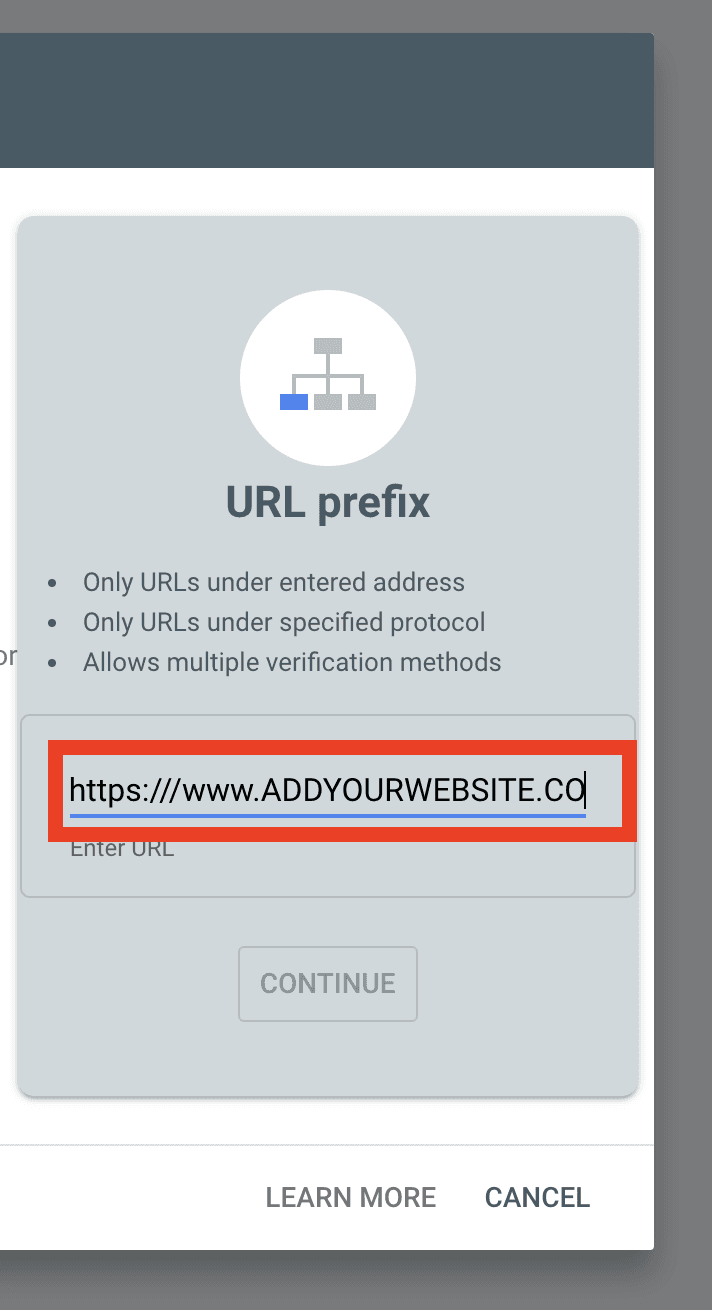
Choose the “URL prefix” option (not Domain)
Enter your full website address — including
https:Click Continue to proceed to the verification step
How Do You Add Your Framer Website to GSC?
You'll be asked to choose how you want to verify your site.
Choose the “URL prefix” option
Enter your full site URL — including
https://
(example:https://yourdomain.com)Click Continue
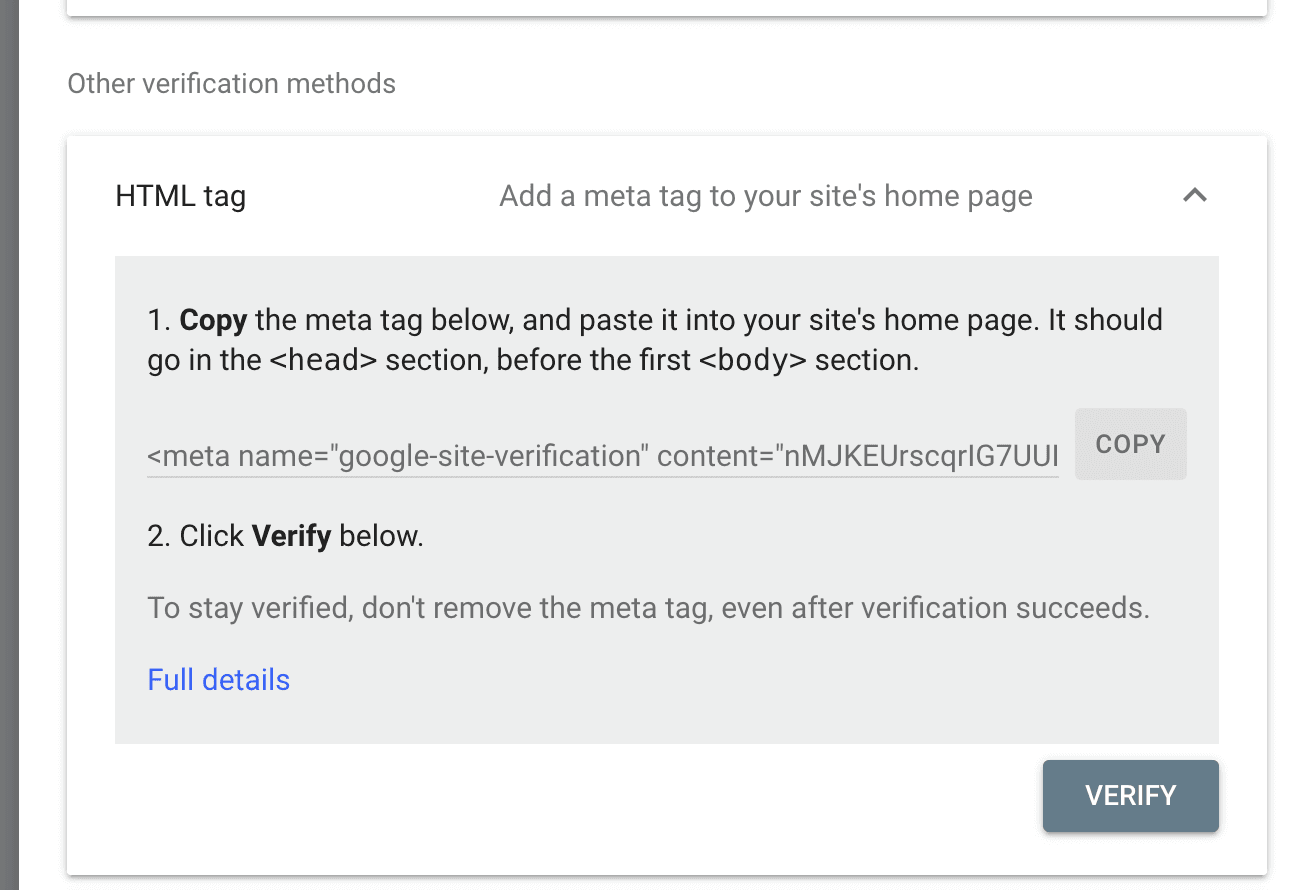
What Verification Method Should You Choose?
You’ll now see several ways to verify ownership.
Pick the HTML tag option.
Google will give you a line of code that looks like this:
Copy the full tag.
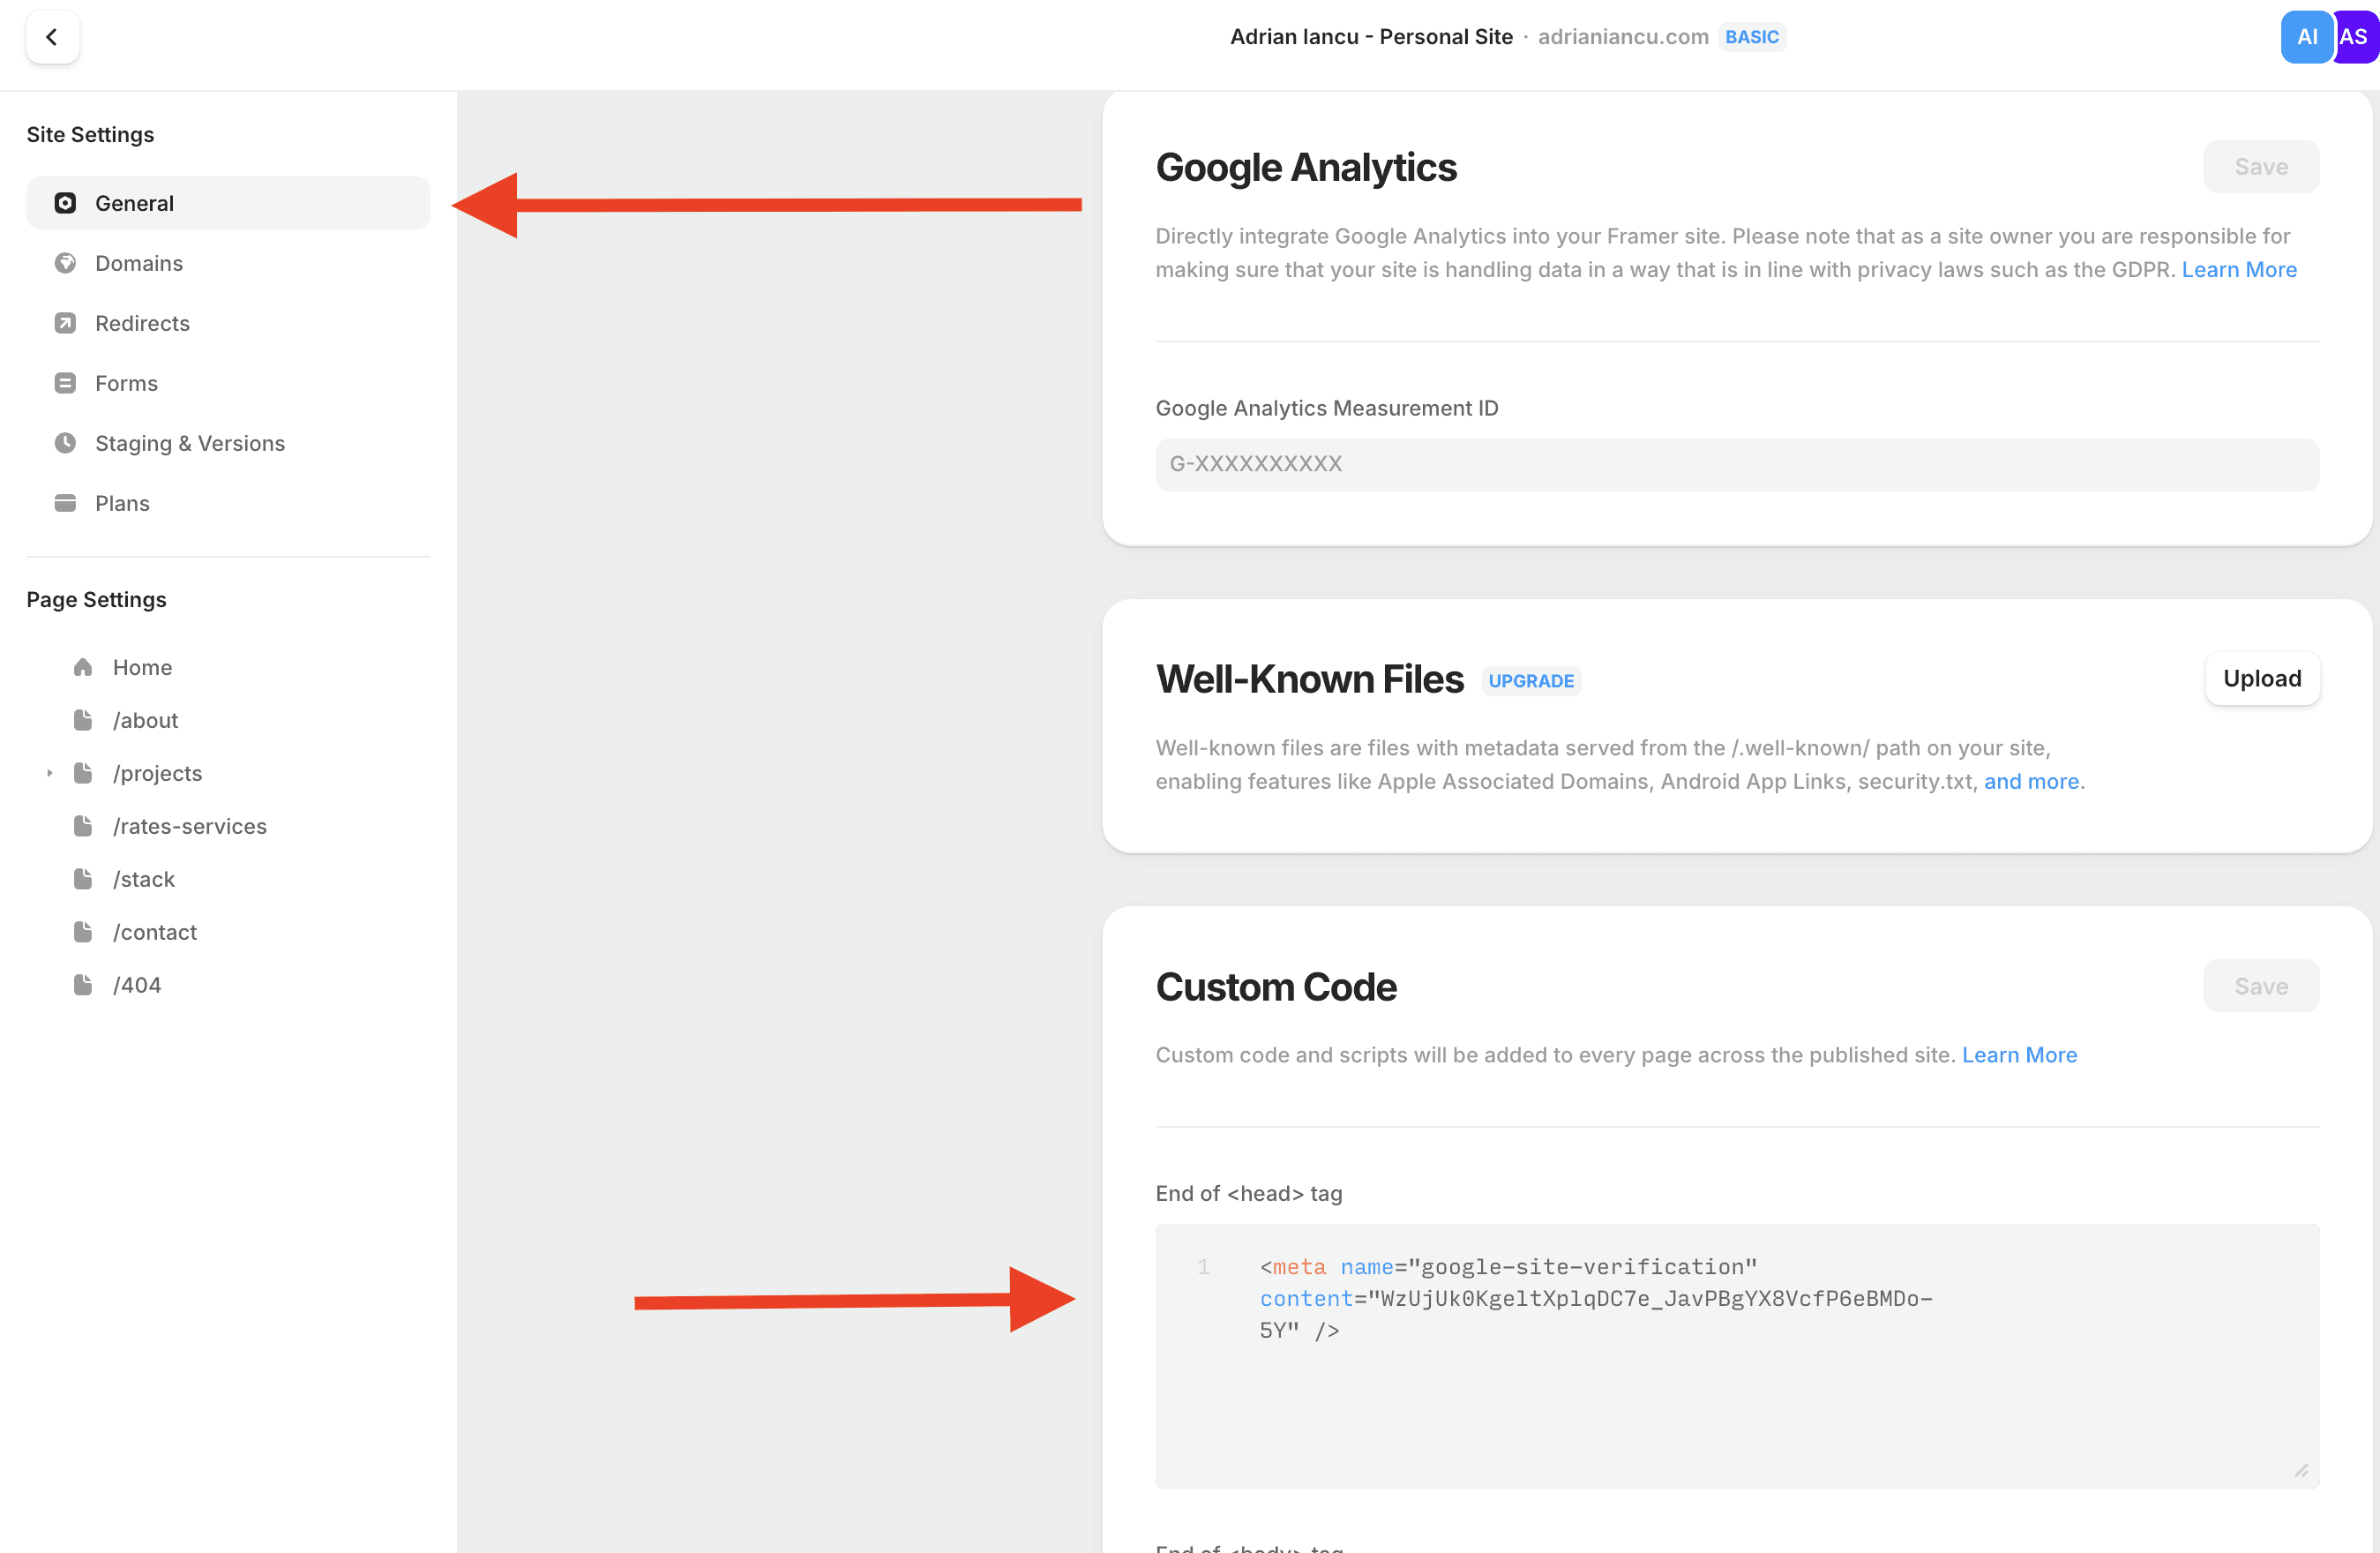
Where Do You Paste the Tag in Framer?
Open your Framer project
Click the gear icon (⚙️) to access Site Settings
Scroll down to Custom Code
In the box labeled End of
<head>tag, paste your verification tagClick Save
Then hit Publish to push the changes live
How Do You Know the Tag Is Working?
To check if the tag is live:
Open your website
Right-click anywhere → choose View Page Source
Press
Cmd+ForCtrl+Fand search forgoogle-site-verification
✅ If the tag shows up in the <head>, you're good to go.
How Do You Complete the Verification?
Go back to Search Console and click Verify.
You should see a green success message confirming you’re now the verified owner. 🎉
How Do You Submit Your Sitemap?
This step tells Google which pages to crawl:
In GSC, go to Sitemaps in the sidebar
Under “Add a new sitemap”, type:
Click Submit
Google will now begin crawling your site — and over the next few days, you’ll start seeing indexing and keyword data.
What Else Should You Know?
Don’t delete the meta tag — it needs to stay live to keep your site verified
Check GSC every couple of weeks to track impressions, clicks, and indexing status
You can also connect Google Analytics 4 for deeper user insights (tutorial coming soon)
What Are the Steps One More Time?
Step | Action |
|---|---|
1 | Go to GSC and click “Start Now” |
2 | Add your full site URL using “URL prefix” |
3 | Choose the “HTML tag” method |
4 | Paste the tag into Framer → Site Settings → Custom Code |
5 | Publish your site |
6 | Click “Verify” in GSC |
7 | Submit |
👋 Ready to Grow?
Connecting your Framer site to Google Search Console is one of the simplest and most powerful steps you can take toward long-term growth.
If you found this helpful, feel free to share it — or reach out if you need help with your own setup.